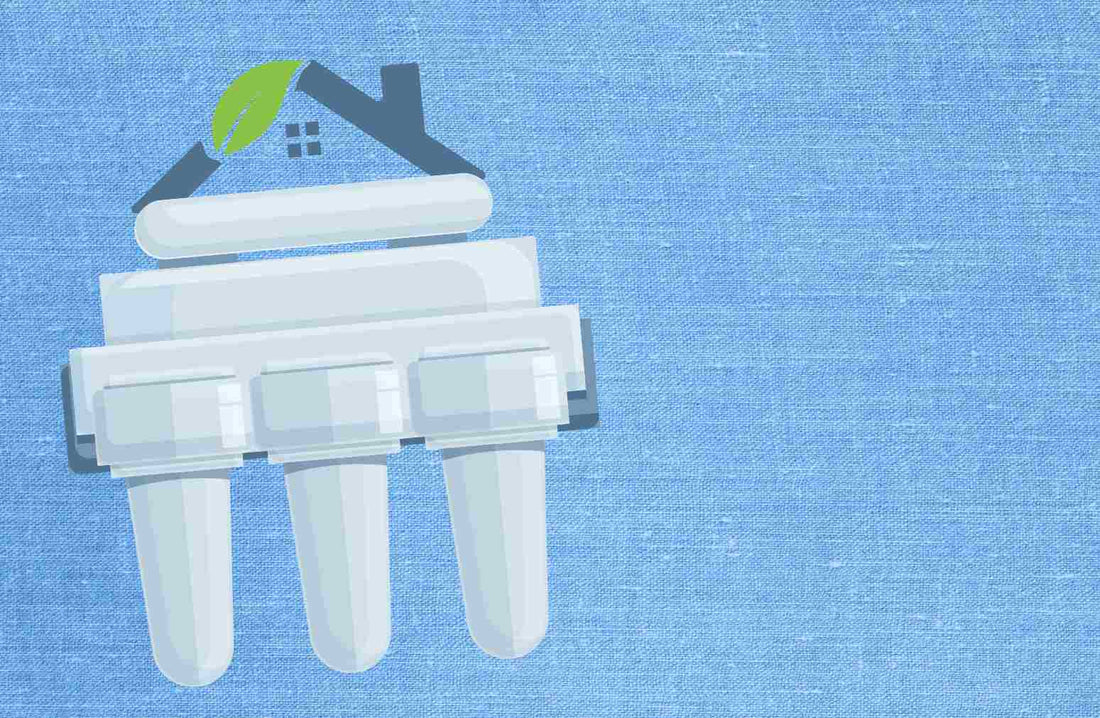
Homemade Reverse Osmosis: Stages, DIY Process, and Application
A process to remove impurities by pushing water through a semi-porous membrane to purify water with DIY parts assembly. This sums up Homemade Reverse Osmosis.
Do you know how safe your water is?
UNEP highlights that:
Over 3 billion people are at risk of disease because the water quality coming out of the source is unknown.
Contamination isn’t something you want in the water. These culprits float around with several diseases.
To fight them, a reverse osmosis system has the efficiency and power. If the cost freaks you out, there’s a DIY approach!
It provides similar results without breaking the BANK much.
| Get the Best Reverse Osmosis Systems in New Jersey |
What is Reverse Osmosis?

A tech unearthed to gatekeep the stuff living in your water.the water quality
Reverse osmosis is an intricate water treatment process. It uses ultra-high pressure to do the job. The system pushes water through a semi-permeable membrane and helps eliminate contaminants.
Such a system typically includes three special filters. The prefilters block the big and post-filters remove the small, invisible impurities while letting cleaner, tastier water flow.
Here’s a list of some contaminants Reverse Osmosis targets:
|
Contaminant Class |
Examples |
|
Chemicals |
Nitrate, chlorine, and fluorine. |
|
TDS |
Aluminum, ammonium, bicarbonate, and iron. |
|
Volatile Organic Compounds |
Benzene and toluene. |
|
Agents |
Pesticides and herbicides. |
|
Dissolved salts |
Calcium, magnesium, sodium, potassium, sulfates, and chloride. |
|
Heavy metals |
Arsenic, lead, chromium, cadmium, and copper. |
|
Particulate matter |
Sediment, silt, lint, and other suspended solids. |
|
Biological contaminants |
Bacteria, viruses, and protozoa. |
|
Radiological elements |
Radium and uranium. |
4 Stages of Reverse Osmosis Process

#1 Pre-Filtration
Raw impure water flows through the sediment and carbon prefilters first. The two filters remove bigger particles and chemicals of 5 microns that can damage the membrane.
For instance— chlorine, lint, sand, rust, and pet dander.
#2 Semi-Permeable Membrane
The somewhat filtered water then passes through the Reverse Osmosis membrane under pressure.
This semi-porous filter removes up to 95+% of big, small, and invisible contaminants.
This includes— salts, microbes, VOCs, TDS, PFAS, and PM.
#3 Post Filtration
Then the filtered water moves through post-activated carbon filters. They help remove any remaining unusual tastes and odors.
This makes the water taste and smell fresher.
#4 Storage
Finally, the purer water is stored in a tank that flows to your faucet.
Here are 5 Benefits of Reverse Osmosis in Your Daily Life
- 95+% Water Purity
- Fresher Taste and Smell
- Cost-Efficiency
- Health Perks
- Eco-Friendly Effects
Step-by-Step Guide to Building a DIY RO System

Materials Needed
- RO Membrane
- Pre-filters i.e. Sediment and Carbon Filter
- Post filter i.e. Carbon Filter
- Water Pump
- Storage tank
- Tubing and Connectors
- Pressure Gauge
- Fittings
- TDS meter
Select A Mounting Location
Find a good spot for your RO system.
The ideal spot can be–
- Under your sink
- Utility area
Ensure it’s close to a water supply and has access to a drain.
Add The Water Pump
Install the water pump before the filters. This will increase the water pressure feeding the RO membrane. Plus, it’ll speed up the process of producing clean water.
It’s an important step if your water source has low pressure.
Set Up The Pre-Filters
Connect the sediment filter to your incoming water line. Secure it with the necessary fittings.
Then attach the carbon filter to the outlet of the sediment one.
They act as the first line of defense. It helps prevent large particles like chlorine and harmful chemicals from getting into your RO membrane.
Install The RO Membrane
Now, take the DIY reverse osmosis membrane.
Attach it to the outlet of your carbon filter.
Ensure you position the membrane correctly and the connections are tight. Most membranes come with instructions. You can read the manual to connect them.
Connect The Post Filter
The purified water that exits the membrane needs to be polished.
So, connect the post filter to the RO membrane’s output.
This ensures that your water is as clean and tasty as possible.
Set Up The Storage Tank
Connect the output from the post filter to the storage tank.
The tank should be pressure-rated. Ensure it can hold purified water without leaks.
Add A Faucet
Install a dedicated faucet. This will draw clean RO water.
It can be a standalone unit or integrated into existing plumbing.
Connect To Waste Water
Your system should have a drain line for wastewater.
Connect it to your home’s plumbing if possible. Position it near a sink.
Use Quality Tubing And Connectors
Get yourself food-grade tubing to connect all the components.
Quality ones ensure the purity of filtered water through–
- Preventing leaks
- Blocking contamination
- Maintaining proper water flow
Test The System
Run water through the DIY RO system for 30 minutes.
This should flush out any— debris, air, or other impurities.
Use a TDS meter to check the quality of purified water.
Why Build a Homemade Reverse Osmosis System?

Cost savings
Start seeing some money in your pocket.
Homemade ones can range from thrifty to slightly pricy if you want to make them fancy.
A high-quality commercial system may cost $4000 to $12000+ depending on features and brands. There are some cheaper options but it’s hard to find an efficient one.
However, DYI Reverse Osmosis can be around $350 to $400. The more parts or technology you add, the more the bucks.
Let’s break it down a little:
|
Components |
Price/Piece (est.) |
Total (est.) |
|
3 Sumps |
$15 |
$45 |
|
3 Membrane Housing |
$15 |
$45 |
|
3 Pack Mounting Brackets |
$20 |
$80 |
|
ASV, Check Valve, Flow Restrictor |
$20 |
$80 |
|
Fittings and Tubing |
$15 |
$100 |
|
Overall Cost Estimation |
$350 |
|
That’s the basic stuff you need to build and that’s how much you may spend for a DIY whole house reverse osmosis system.
However, some manufacturers also sell DIY RO water purifier kits. They’re affordable too.
Customizability For Specific Needs
The best part of the DIY RO system is just that– it’s yours!
You can tailor the system to fit the specific needs, be it for—
- Drinking water
- An aquarium
- Watering your plant
This makes them better than commercial ones. It’s because factory-produced systems have features that add up the price but aren’t necessary.
For instance,
You can pick filters that target particular contaminants in your local water supply like–
- Softener filter for hard water
- Sediment filter for dirt or other impurities
This saves you from spending extra on a system that filters all the impurities when your water only has a few.
Reduced Water Waste
US EPA highlights that–
“Commercial Reverse Osmosis filters waste around 5 to 10 gallons of water for every 1 gallon of treated water.“
This is downright an imprudent nature!
However, with the best homemade reverse osmosis system, you can control that.
All you have to do is:
- Select high-efficiency membranes
- Adjust the recovery rate
This helps you produce more purified water while reducing water waste.
Moreover, adding pre-filters also helps improve overall efficiency and minimize excess water processing.
That’s the advantage of homemade reverse osmosis you need.
It offers the flexibility to make modifications with ease. Consequently, you can enhance performance and gain control over water use.
4 Common Applications Of DIY RO System
1. Aquariums
Have a pet fish? Get yourself a DIY RO System for Aquariums.
Most fish species and marine life require specific conditions to thrive. This is hard to maintain when you have regular tap water.
However, the homemade system helps you create that perfect environment. It filters impurities like chlorine, nitrates, and metals that aquatic species are sensitive to.
Result: The fish gets a safer environment around purified water.
Moreover, some species need minerals from water to develop healthy muscles and bones. In that case, have a remineralization filter.
It puts the calcium and magnesium back into the water.
2. Small-Scale Farming
It’s for those with a garden or farm.
Clean water is vital for irrigation. Homemade RO gives you that advantage.
It removes harmful enemies that accumulate in the soil over time and cause damage to the crops. These include—
- Chemicals
- Salts
- Pests
- Microbes and diseases
Not just that! There are more benefits of DIY reverse osmosis for small-scale growers! Some are–
- Enhanced crop growth and health
- Boosted production
- Better nutrient absorption
- Disease resistance
- pH balanced
- Consistent moisture
If you’re planning to use one, consider these adjustments. For instance–
- Large storage tanks
- Low-pressure drip irrigation system
3. Maple Syrup Production
Did you know?
Homemade RO water for syrup production saves time and energy. The system helps concentrate the sap before boiling.
Experts say that:
“You can remove up to 75% of the water from the sap with a reverse osmosis tech.”
This eventually reduces the cooking time for producing maple syrup. Moreover, it reduces fuel costs too in the long run.
Want to explore Maple Syrup Production with RO? Try to personalize the system by incorporating—
- Membrane selection optimized for maple sap
- High-capacity pumps for large volumes of sap
- Flow rate adjustments to control concentration
Here’s a reverse osmosis maple syrup diagram to give you an idea–

[Image Source: Roseum Maple Syrup]
4. Whole-house Water Systems
A whole-house system blesses the whole family with purified water.
All the members can use it for drinking, cooking, and bathing.
DIY versions of these systems also offer the same benefits but at a lower cost.
Tips For Troubleshooting Common Issues
Low Water Pressure
Want it to function efficiently?
RO systems need a minimum water pressure of 40 PSI for that. If your tap water pressure is lower than the range, get a booster pump.
Low Flow Rate
Not getting enough purified water?
The filters may have some issues. Check for the clogs and damage.
No matter what the problem is with the filter, it’s better to buy high-quality filters and RO membranes.
Ensure it’s in good condition and set up properly.
Bad Taste and Odors
The water doesn’t feel good, right?
Sometimes, you may notice an off-taste or odor coming out of RO water. This could indicate that the filters need replacement, especially the post filters.
It’s because the job of carbon post filters is to fix the taste and smell.
Maintenance and Upkeep
Regular Inspection
Keep track of how much water you use and when you last changed the filters.
Check all the connections, seals, and the entire system once in a while. Look for signs of leaks, damage, or anything strange.
Consider having a water testing kit like a TDS meter to ensure the water stays pure. They’re easily available online and at your local hardware store.
Filter Replacement
Depending on the usage, replace–
- Sediment and carbon filters every 6 to 12 months.
- RO membrane every 2 to 3 years
Usually, the membrane should last 2 to 5 years but it’s safer to monitor it. Follow the manufacturer’s guidelines for replacement.
Cleaning The System
Flush the system regularly with clean water.
This should help prevent clogging and bacterial growth.
It’s because a DIY reverse osmosis system can accumulate debris over time. It affects the flow speed, water quality, and everything associated.
So, clean the parts every 6 months and sanitize them every 3 to 12 months. Follow the instructions properly to avoid damaging the membrane or other filters.
Regular Water Use
Don’t let the water sit there.
RO system typically includes a storage tank. When water stays unused, it becomes a breeding ground for microbes. This makes your water impure, affecting the quality, taste, and smell.
So, use the water regularly to avoid such issues.
Alternatives to Reverse Osmosis
Natural Purification Method
Activated Carbon
Great for removing impurities, chemicals, and odors from water.
Distillation
Boil water and capture the steam to leave impurities water.
UV Purification
Uses ultraviolet light to kill microorganisms in water while keeping minerals intact.
Factors To Consider
- Efficiency
- Water quality
- Certification
- Ease of installation
- Ease of maintenance
- Filtration capacity
DIY or Professional? Get Expert Reverse Osmosis Solutions Today!
Building a homemade reverse osmosis system can be challenging and may not provide the best filtration efficiency. Instead of guessing, let the experts at NJ Water Systems help you install a high-quality, professionally designed RO system for pure, great-tasting water. Schedule a free consultation today and enjoy safe, hassle-free water filtration in your home!
📍 Visit us or book your free water test now!
FAQs About Homemade Reverse Osmosis Systems
Can I make my own reverse osmosis system?
Of course! You can.
Just get an RO Membrane, Pre-filters, post-filters, Water Pump, Storage tank, Pipes, and Connectors. You can assemble them and make your own reverse osmosis system.
What is the best alternative for RO water?
You can try activated carbon, distillation, and UV purification. All these are top alternatives to the RO water system.
How to RO water at home?
Consider homemade or commercial RO systems to purify water at home. They are easy to install and maintain.
What is natural reverse osmosis?
Natural reverse osmosis doesn't exist in the traditional sense.
It’s a mechanical process and works effectively with specific parts and equipment.
What is reverse osmosis in a home?
At home, reverse osmosis is a fine water treatment method that pushes water through a semi-porous membrane to purify water.
How to purify water naturally?
Boil water. That’s the best way to kill bacteria and other pathogens and purify water naturally.